How To … Brew Mead
Traditional mead is made with honey, fresh spring water, and yeast. Use natural honey, preferably from a beekeeper, or buy the best-quality honey you can afford. You may use wild yeast, but this is unpredictable and has a high failure rate. Use store-bought packets of yeast only as a last resort.
I’ve found 2 methods to brew it. One I’ll call “traditional” and the other a more up to date and easier method especially for “newbies” like myself. This method requires no specialist equipment and I’ve called it the “Easy Bread Yeast Mead Recipe”. I’ve only tried this method.
Easy Bread Yeast Mead Recipe ...
If you are new to mead making, here is a simple and affordable recipe that does not require any specialized mead brewing equipment. Best of all, you should be able to buy everything you need for this one gallon mead recipe at your local grocery store.
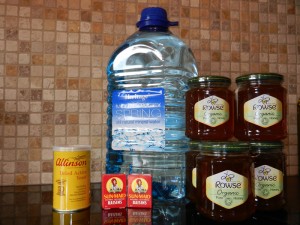
 You will need the following:
- 1 gallon (3.8L) spring water
- 2 to 3 lbs (900g-1,360g) of unprocessed honey
- 1 large balloon
- 1 package of active dry yeast
- 1 small box of raisins
- 1 needle or safety pin
Before you begin, it is important that any bowl or utensils used are clean and sanitary. Harmful microbes and bacteria can produce off tastes or ruin a batch of mead completely.
You will notice that the instructions call for ‘2 to 3’ pounds (900g-1,360g) of honey. Using 2 lbs will provide a dryer mead while using 3 lbs results in a sweeter mead. Both choices will work, it all depends on your tastes.
1. Allow your tightly-sealed container of honey to sit in a sink full of hot water for around 15 minutes. This will make the honey less viscous so that it pours easily.
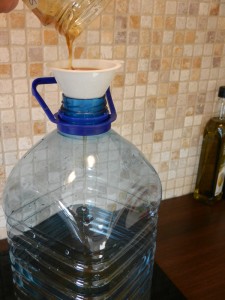
2. Empty half of the water out of the 1 gallon jug into a large bowl or pitcher. This creates enough space to add the honey. Carefully pour your honey into the jug doing your best not to get any honey on the lip of the jug (or anywhere else).
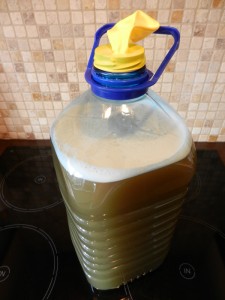
3. Add the yeast and 15 to 20 raisins and screw the cap pack on the jug. Vigorously shake the jug for several minutes to thoroughly mix and aerate the must. Remove the cap and add just enough spring water to leave an inch or two of head space. Replace the cap and shake again to mix in the additional water.
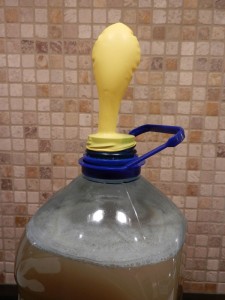
4. Take a needle, safety pin, tack, or other sharp object and punch a small hole in the top of a balloon. This hole will allow the carbon dioxide released during fermentation to escape. Remove the cap from the jug and replace with the balloon. Set the jug of must in a cool dark space and wait…
5. Within 24 hours fermentation should begin and you will see hundreds of tiny bubbles climbing up the sides of the jug. The balloon should be firm, but not inflating. If the balloon does start to inflate, punch an additional hole to release the building pressure.
6. After 7 to 10 days of fermentation, you should no longer see bubbles and the balloon should be deflated. If you see bubbles rising or the balloon is still inflated, wait a few more days to ensure fermentation has completed.
7. The mead should be racked (transferred) into a different sanitary container (jug, bottle, etc) taking care to leave behind the sediment and raisins. After an additional 3 to 6 months storage in a cool dark place, you should have a surprisingly drinkable mead from this very simple and affordable recipe.
If you want to make a few more batches of easy mead before investing in brewing and fermenting equipment, here are a couple of tips to spice up the basic recipe. Try adding a cinnamon stick during fermentation or after racking. A sliced vanilla bean will also add an interesting flavour to this very simple recipe. There are also many kinds of fruit suitable for addition to mead.
The more 'Traditional' Method ...
2. Mix eight pounds (3.6Kg) of honey into the water.
3. Bring the mixture to a boil. A foam will collect on the top. Skim this off. Keep boiling and skimming until no more foam appears.
4. Leave the brew to cool until it is lukewarm, then add the yeast and stir to bring a little oxygen to the water and kick-start the fermentation process.
5. Cover the cauldron with a cloth, and leave it in a cool dark place for a fortnight. Use a shed or barn, as the smell will be overwhelming. You can add fruits or berries to make ‘melomel’ mead, or spice it with herbs to make ‘metheglin’. Tie up your fruits or spices and herbs in a small linen bag, then boil in a little water to sterilize before adding to the brew. Wait until the brew has become strong, otherwise wild yeast or bacteria from the air may take over your yeast and spoil the mead.
7. Pour or ladle the mixture into sterilized bottles or demijohns, being careful not to disturb the sediment in the bottom of the cauldron. Stopper the brew.
8. Save a little sediment, mix it in a bottle with purified spring water and a little honey, and leave in a cool place; this is your live yeast culture that you can use next time. Keep feeding it, like a pet, with a little honey every four months.
9. Leave the bottles in a cool dark place for at least six weeks, when the mead will be ready to drink, although it will improve with time.
Remember, mead is much stronger than it tastes; it is deceptive by nature, so take care.


You must be logged in to post a comment.